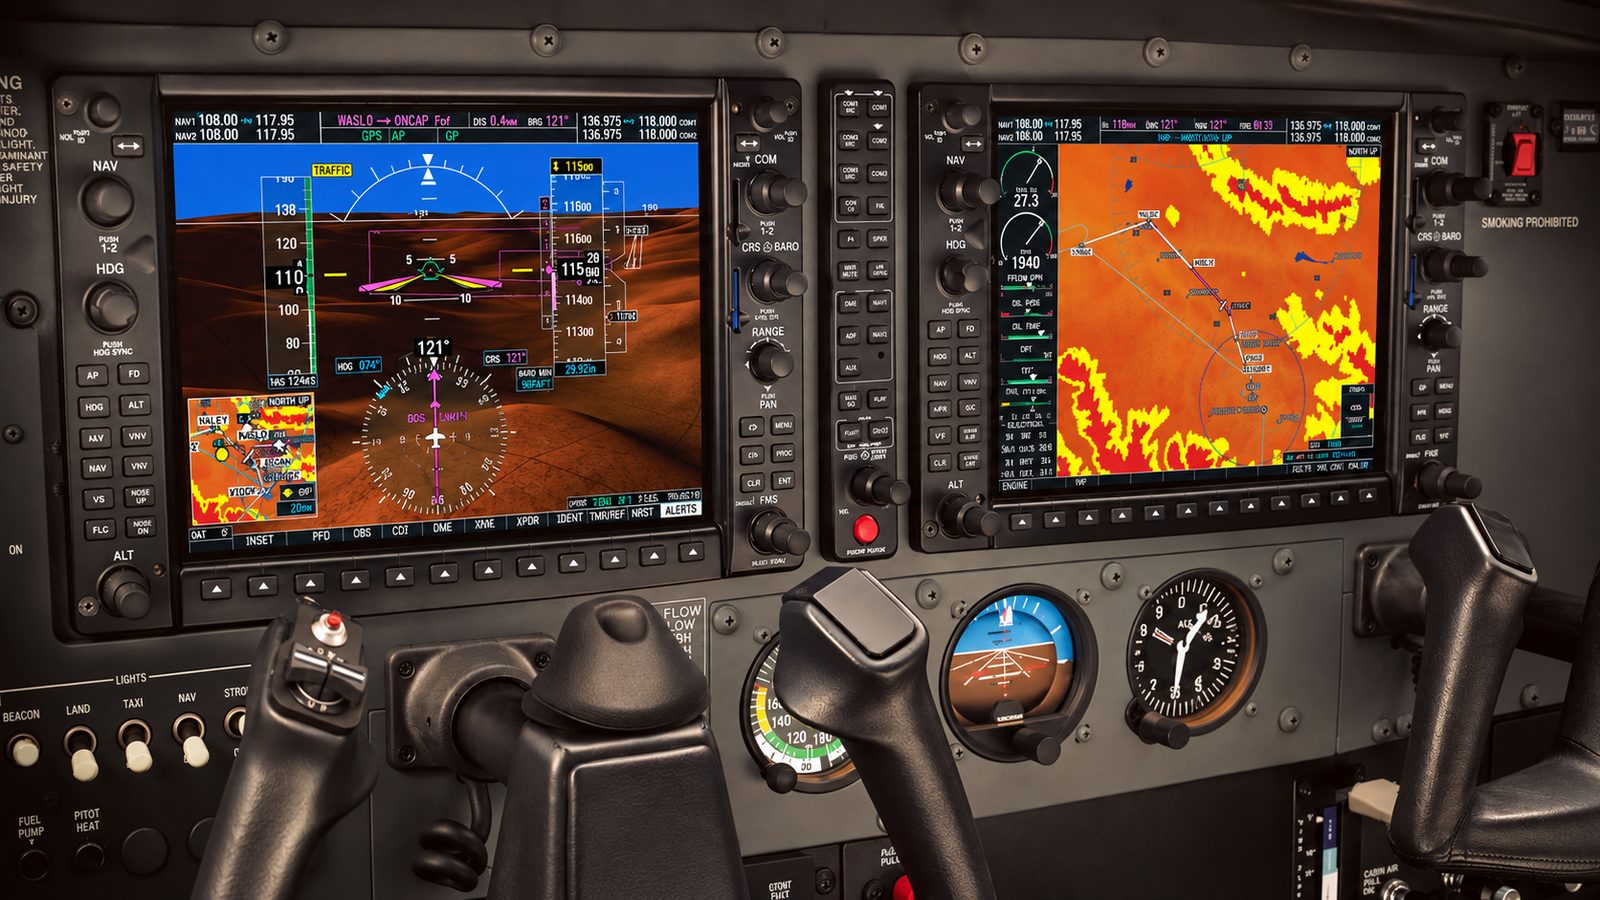
If you fly more than one type, you have probably lived this scene: you strap into an unfamiliar rental or a newly purchased aircraft, open the Pilot Operating Handbook (POH), and start hunting for a specific item. You need short‑field performance at today’s density altitude, or you want to verify a fuel limitation. Instead of finding it in seconds, you end up flipping back and forth through a thick book organized in some engineer’s private logic.
That kind of confusion is exactly what the FAA and industry set out to fix in the mid‑1970s.
For most light airplanes built after 1975, the POH follows a standardized nine‑section format. In many models, that POH is also the FAA‑approved Airplane Flight Manual (AFM). The idea is simple: whether you are in a Cessna 172, a Piper Archer, or a Beech single, the information you need lives in the same place and follows the same order.[1][3][5]
Yet plenty of pilots still cannot list the nine sections from memory, and even fewer understand why Section 2 (Limitations) comes before Section 4 (Normal Procedures), or why Emergency Procedures sit ahead of the routine checklists you use on every flight.
As an owner or prospective buyer, that lack of familiarity is not academic. It directly affects:
- How quickly you can respond in an abnormal or emergency situation
- How accurately you calculate performance and loading
- How thoroughly you evaluate an aircraft during pre‑buy
- How you defend yourself if there is ever an incident, claim, or legal review
My goal here is not to teach you how to read one particular manual. It is to give you a framework for all of them. Once you understand the standardized POH structure, you can step into almost any post‑1975 GA cockpit and know exactly where to look for the information that matters most.
Let us start with how we got this structure in the first place.
Table Of Contents
- The 1975 Revolution – How FAA and GAMA Standardized Aviation Safety
- The Sacred Order – Why POH Sections Flow From Critical to Routine
- Section‑By‑Section Deep Dive – The Nine Pillars of Aircraft Knowledge (Part 1: Sections 1–3)
- Section‑By‑Section Deep Dive – The Nine Pillars of Aircraft Knowledge (Part 2: Sections 4–6)
- Section‑By‑Section Deep Dive – The Nine Pillars of Aircraft Knowledge (Part 3: Sections 7–9)
- The Standardization Advantage – Why Consistency Saves Lives and Money
- Pre‑Purchase Intelligence – Using POH Knowledge to Evaluate Aircraft
- Common Pitfalls and How to Avoid Them
- Conclusion – Maximizing Your POH Investment
- FAQ
- Sources
The 1975 Revolution – How FAA and GAMA Standardized Aviation Safety
Pre‑1975 Chaos – When Every Manual Was Different
Before 1975, aircraft documentation was the wild west. Each manufacturer produced its own combination of AFM, owner’s manual, and various supplements in whatever format made sense to them.
If you have ever looked at a 1960s‑era “Owner’s Manual,” you know the pattern. Some are thin, marketing‑style booklets with a few procedures and performance numbers. Others are highly technical but organized in non‑intuitive ways. Critical limitations might be scattered between a few pages of text, a placard diagram, and a performance table.
That fragmentation created real operational problems:
- Pilots transitioning between brands had to relearn each manual’s layout from scratch
- CFIs struggled to standardize training across mixed fleets
- Emergency procedures might be buried mid‑chapter instead of grouped where you can find them under stress
- Performance data could be hard to find, inconsistently labeled, or incomplete
The airplanes themselves might have been well designed, but the “human interface” through the handbook was not.
The Birth of Standardization
To fix this, the FAA and the General Aviation Manufacturers Association (GAMA) worked together to create a standardized handbook structure. The goal was to meet the regulatory requirements for an AFM under the certification rules for normal category airplanes while giving pilots a consistent, usable format across aircraft types.[3][5]
The result is the now‑familiar nine‑section POH/AFM framework:[3]
- General
- Limitations
- Emergency Procedures
- Normal Procedures
- Performance
- Weight & Balance / Equipment List
- Systems Description
- Handling, Service & Maintenance
<lisupplements< li=""> </lisupplements<>
Manufacturers can still add optional material (for example, a Safety Tips section or an index), but the spine of the book is set.
Standardization changed daily flying in some very practical ways:
- A pilot moving from a Cessna 172 to a Cessna 152 or a Piper Cherokee can go straight to Section 3 for emergencies, Section 5 for takeoff data, Section 6 for loading
- Training syllabi and checkrides can reliably reference specific sections
- Critical data like limitations and emergency procedures are clearly separated and highlighted instead of buried in narrative text
Today that structure is so ingrained that many pilots have never seen anything else. To get the full value from it, you need to understand not just what the nine sections are, but why they are arranged in that specific order.

The Sacred Order – Why POH Sections Flow From Critical to Routine
The nine sections are more than a table of contents. The order is deliberately designed to steer your priorities and behavior.
The Life‑Saving Logic Behind Section Sequence
Here is the canonical order for most post‑1975 light aircraft:[1][3][5]
- General
- Limitations
- Emergency Procedures
- Normal Procedures
- Performance
- Weight & Balance / Equipment List
- Systems Description
- Handling, Service & Maintenance
- Supplements
Notice how the book moves from critical to routine and from immediate operational needs to background understanding.
- Section 2 – Limitations comes early because these are the non‑negotiables: speeds, weights, structural boundaries, and environmental limits you must respect on every flight. Before you worry about how to do a short‑field takeoff, you must confirm it is even legal and safe at today’s conditions.
- Section 3 – Emergency Procedures precedes Normal Procedures for a reason. When something goes wrong, you do not have time to flip past normal checklists and cruise profiles. Time‑critical items (engine failure after takeoff, fire, electrical failure, etc.) are grouped together so you can access them immediately.
- Section 4 – Normal Procedures then walks you through the life cycle of a typical flight: preflight inspection, start, taxi, run‑up, takeoff, climb, cruise, descent, approach, landing, and shutdown.
- Section 5 – Performance follows because once you know your normal procedures, you need the numbers: takeoff and landing distances, climb rates, cruise fuel flows, and so on.
From there, the book transitions into planning, understanding, and support material (weight and balance, systems, handling, and supplements).
The hierarchy is deliberate:
First know what you must not break.
Then know how to survive the worst‑case.
Then know how to operate efficiently and comfortably.
Cognitive Load in Aviation
Under stress, your brain does not operate like it does in ground school. You narrow your attention, revert to training, and lose easy access to fine‑grained memory. A standardized POH structure is essentially a cognitive load management tool.
When every POH organizes information the same way, you can:
- Build muscle memory: emergencies in Section 3, takeoff distances in Section 5, systems details in Section 7
- Avoid wasting mental energy deciphering each manufacturer’s “creative” manual layout
- Train consistently: instructors can teach the same search pattern and habits across different aircraft
That uniformity gives you a mental shortcut. Even if you have never seen that exact model’s POH before, you still know where to start looking.
Real‑World Consequences of Ignoring Sequence
When pilots treat the POH as a “nice‑to‑have” or only ever open Section 4 for the normal checklists, a few things tend to happen:
- They exceed limitations they never fully internalized: operating near the edge of the weight envelope, flying in conditions that are actually prohibited, or using flap/gear speeds based on memory instead of the book
- They discover in an emergency that the checklist they assumed was “obvious” calls for a different configuration or order of actions in that specific model
- After an accident, investigators and insurance adjusters will look closely at whether published limitations and procedures were followed, and whether the POH for that aircraft was applicable and complete
The structure of the POH is designed to put the information that protects your certificate, your airplane, and your life right up front. Use it that way.
Section‑By‑Section Deep Dive – The Nine Pillars of Aircraft Knowledge (Part 1: Sections 1–3)
Section 1 – General Information
Section 1 orients you to the airplane. It typically includes:[3][7]
- Aircraft model and variant, serial applicability, and certification basis
- A brief description of the aircraft and its intended category (normal, utility, aerobatic, etc.)
- Basic dimensions and three‑view drawings
- Standard and optional equipment overview
- Definitions, abbreviations, and symbology used throughout the manual
The three‑view drawing and data here are more than trivia. They tell you:
- Wingspan and overall length (critical for hangar fit and tight ramp operations)
- Height and propeller ground clearance (important for rough or sloped surfaces)
- Minimum turning radius (useful for taxi planning and tight ramps)
As an owner, I use Section 1 to verify:
- The exact configuration and serial range the manual applies to
- Any special definitions or symbology that might affect how I read performance charts later
For a buyer, Section 1 is your quick check that the POH really matches the airplane on the ramp. If the drawings, model designation, or description obviously do not line up, you may be looking at the wrong manual or a generic “training only” copy.
Section 2 – Limitations (The Non‑Negotiables)
Section 2 is where the FAA‑approved operating limitations live. This is the legal and physical envelope of your aircraft. It generally includes:[7]
- Approved maneuvers and operating categories (normal vs utility, aerobatic approval if any)
- Airspeed limitations and V‑speeds: Vne, Vno, Va, Vfe, Vle/Vlo where applicable
- Weight limits: maximum takeoff, landing, ramp, and baggage compartment limits
- Center of gravity (CG) range limits and loading envelopes
- Powerplant limitations: RPM, manifold pressure, and temperature limits
- Fuel and oil limitations: usable fuel, grades, and approved types
- Environmental and configuration limitations: maximum demonstrated crosswind, icing limitations, maximum operating altitude for certain systems, and so on
Many pilots remember a handful of V‑speeds and the gross weight, but overlook the finer points buried in this section. I pay specific attention to:
- Baggage compartment and seat weight limits, and any special notes about how they affect CG
- Restrictions on fuel imbalance or minimum fuel in a tank for takeoff and landing
- Flap, gear, and window or door open speeds
- Prohibitions on slips with flaps, spins, or specific maneuvers
As an owner‑pilot, I treat Section 2 as required reading any time I start flying a different serial variant or after a major modification. For buyers, mismatches between cockpit placards and Section 2 limitations are a red flag that someone has been careless with either maintenance or documentation.
Section 3 – Emergency Procedures (When Things Go Wrong)
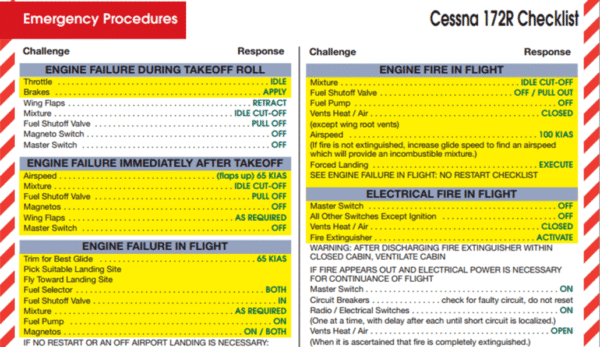
Section 3 covers the procedures you hope you never use, but must be able to execute under maximum stress. It typically includes:
- A condensed “Emergency Procedures at a Glance” or quick‑reference checklist
- Immediate action (often boldface) items for time‑critical failures: engine fire on start, engine failure after takeoff, engine failure in cruise, cabin or electrical fires, and so on
- Amplified procedures that expand those quick‑reference steps into explanations
- Abnormal procedures: alternator failure, static source blockage, door opening in flight, rough engine, partial panel, and similar issues
This section is organized by failure mode, not by phase of flight. If the engine quits in cruise, you come straight here instead of digging through cruise procedures in Section 4.
Here is how I recommend using Section 3 as an owner:
- Identify the boldface or immediate‑action items and commit them to memory, then use the printed checklist as a back‑up
- During annual proficiency training, run through the major emergency and abnormal checklists in the airplane or a simulator
- Double‑check that any modifications in Section 9 have not changed relevant emergency or abnormal procedures
For buyers, I like to see that Section 3 is complete and that any major aftermarket systems (turbo, TKS, floats, glass panels, and so on) have corresponding procedures in the supplements. If the airplane has complex equipment but the emergency section still looks “stock,” you will need to fix that.
Section‑By‑Section Deep Dive – The Nine Pillars of Aircraft Knowledge (Part 2: Sections 4–6)
Section 4 – Normal Procedures (Everyday Operations)
Section 4 is the core of day‑to‑day flying. It lays out the full sequence of a normal flight in checklist form:
- Preflight inspection
- Before engine start, engine start, and after start
- Taxi and run‑up
- Before takeoff, takeoff, and climb
- Cruise and system management
- Descent, approach, and before landing
- After landing, shutdown, and securing
- Normal use of key systems (fuel, electrical, cowl flaps, environmental, and similar items)
This section is model‑specific. Even between variants of a “familiar” type, details can change:
- Recommended power settings for climb, cruise, and approach
- Use of flaps for various takeoff and landing scenarios
- Fuel tank switching policies and timing
- When to use electric fuel pumps, alternate air, or cowl flaps

As an owner, I align my personal flows and custom checklists with Section 4, and only deviate when I have a clear reason and can defend it. If an instructor or previous owner’s tribal knowledge conflicts with the book, I treat the book as the default.
As a buyer, I look for signs that previous operators have respected these procedures:
- Checklists that match the POH rather than a random collection pulled from the internet
- Reasonable correlation between fuel burn, engine condition, and the power settings the book recommends
Big, unexplained deviations between the way the airplane has been flown and the way the POH describes it deserve a closer look.
Section 5 – Performance (Numbers That Matter)
Section 5 is where the math lives. This is the section that keeps you from running off the end of a short runway or trusting a fuel guess that is 30 minutes too optimistic. It typically includes:[7]
- Takeoff distance charts for normal and short‑field operations, often including obstacle clearance
- Landing distance charts for normal and short‑field techniques
- Climb performance tables: rate of climb versus weight and temperature, and time‑to‑climb
- Cruise performance tables: power setting versus altitude and temperature, with fuel flows and true airspeeds
- Range and endurance charts
- Stall speeds for various configurations
- Miscellaneous performance: glide distances, balked landing performance, maximum demonstrated crosswind, and similar items
You get full value from Section 5 when you use it proactively, not just when the runway looks short.
My practice:
- Plan every takeoff and landing with generous margins. Treat the POH distances as best case with a test pilot, new engine, perfect technique, and ideal conditions. Add extra room for your own technique, surface condition, slope, and engine wear.
- Respect density altitude. Most Section 5 charts are corrected for pressure altitude and temperature. Get comfortable with reading them accurately and quickly.
- Use the cruise and fuel flow tables instead of relying on rules of thumb. Then compare your actual fuel burn against those numbers to see how your engine and prop are really performing.
As a buyer, I want to see performance charts that clearly match the current engine, propeller, and gross weight, not photocopied pages from a different variant. If the airplane has been modified but the performance section is still stock, assume you will need to address that.
Section 6 – Weight and Balance (The Foundation of Safe Flight)
Section 6 is often combined with the equipment list, and it is where many pilots are weakest. It generally contains:[3][7]
- Empty weight and moment data as delivered from the factory
- Instructions for calculating loaded weight and CG
- CG envelope charts and loading graphs
- Sample problems and example loading scenarios
- Equipment lists with weight and moment for installed components
In the real world, the airplane’s empty weight and CG move over time as avionics, interiors, paint, and other modifications accumulate. That makes Section 6 a living document.
As an owner, I insist on:
- An up‑to‑date weight and balance that reflects the current configuration, backed up by logbook entries for major changes
- Familiarity with a few representative loading scenarios: solo with full fuel, full passengers and bags, aft‑CG baggage load, and so on
- Awareness of how close I typically operate to the CG limits, not just gross weight
As a buyer, weight and balance is one of the first places I look for red flags:
- Old data that still lists equipment that was removed years ago
- Handwritten edits with no supporting logbook entries
- No evidence of a revised weight and balance after obvious major mods
If the seller cannot produce a current, defensible weight and balance, budget time and money to correct it and ask yourself what else has been handled casually.

Section‑By‑Section Deep Dive – The Nine Pillars of Aircraft Knowledge (Part 3: Sections 7–9)
Section 7 – Systems Description (How It All Works)
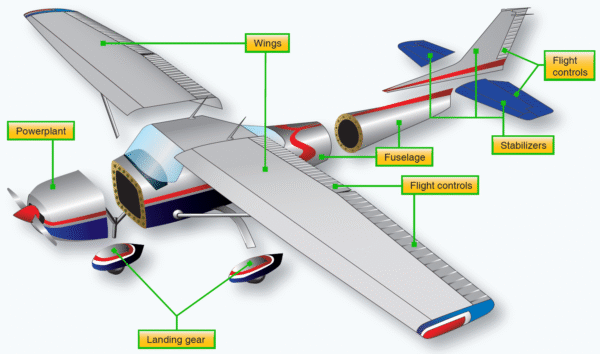
Section 7 is your systems textbook for that specific aircraft. It typically walks through each major system:[7]
- Powerplant and propeller
- Fuel system
- Induction and ignition
- Electrical system
- Landing gear and brakes
- Flight controls and flaps
- Pitot‑static and instruments
- Environmental systems (heat, defrost, air conditioning if installed)
The level of detail is tuned to the likely pilot for the airplane: a simple trainer has straightforward descriptions; a high‑performance or complex aircraft goes deeper.
Solid systems knowledge pays off in several ways:
- You can interpret abnormal indications and pick the right emergency or abnormal checklist instead of guessing
- You know how the airplane will behave when a system fails, such as fuel feed patterns, battery‑only endurance, or alternator failure effects
- You speak the same language as your maintenance shop when troubleshooting
For owners and buyers, I check whether the narrative in Section 7 still matches reality. If the fuel diagram shows a left‑right‑both selector but the panel has something else, or the electrical description does not line up with the installed avionics, you will be relying on inaccurate information unless a supplement fixes it.
Section 8 – Handling, Service, and Maintenance
Section 8 is aimed at both pilots and maintainers. It usually includes:
- Ground handling procedures: towing points, jacking, lifting, tie‑down, and mooring
- Servicing instructions: fuel grades, oil types and capacities, tire pressures, strut inflation, hydraulic fluids
- Cleaning and corrosion prevention guidance
- Storage, cold weather considerations, and recommendations for long‑term inactivity
As an owner, this section has a lot to do with how your airplane ages. Using the wrong jack points or towing techniques can damage structure. Incorrect tire pressures or strut servicing affect handling and wear. Poor storage practices shorten the life of paint, seals, and avionics.
Even if your shop handles most of the hands‑on work, you sign the logbook every time you fly. Knowing what “right” looks like in Section 8 helps you supervise maintenance, recognize bad practices, and catch problems early.
Section 9 – Supplements (The Living Document)
Section 9 is the most misunderstood part of many POHs, and ignoring it is risky. It contains supplements for:[1][2][9]
- STC installations (floats, TKS, turbo‑normalizers, long‑range tanks, and so on)
- Avionics options and upgrades (autopilots, GPS units, glass panels, ADS‑B equipment)
- Special operations approvals (IFR GPS, RNAV, particular kinds of operations)
- Changes to limitations, procedures, performance, and weight and balance caused by those modifications
Supplements are not optional reading. Many of them:
- Add or change limitations (for example, speed limits with certain configurations, new weight restrictions, prohibited operations)
- Modify normal and emergency procedures for the affected systems
- Adjust performance data such as climb rate or fuel burn
- Add required equipment lists for certain types of operations
A floatplane supplement, for example, typically revises takeoff and landing performance and adds water‑specific emergency procedures.[10]
As an owner, I treat Section 9 as the “delta” between the base airplane and the actual machine I fly. I want:
- A supplement for every significant non‑factory system that affects operation
- Clear ties between the supplements and any changes they make in Sections 2 through 6
- Confidence that each supplement matches the brand and model actually installed
As a buyer, missing or mismatched supplements are a major negotiation point. If there is a sophisticated GPS and autopilot but only generic or outdated supplements, you will need to invest in documenting and, in some cases, re‑evaluating how the airplane is being flown.
The Standardization Advantage – Why Consistency Saves Lives and Money
Once you internalize the nine‑section structure, you pick up advantages that go well beyond checkride prep.
Multi‑Aircraft Operations Made Safer
If you fly or manage a multi‑aircraft operation, standardized POHs reduce friction:
- Transition training is faster because pilots are not relearning “where the book hides things” every time
- You build consistent habits around where to look for limitations, emergency steps, and performance numbers across the entire fleet
- CFIs and check airmen can teach and evaluate to a common pattern, reducing ambiguity
From a risk management perspective, fewer surprises when moving between aircraft equals lower risk. The standardized POH structure is a quiet but important part of that safety net.
Resale Value Protection
Documentation quality and completeness show up quickly when you go to sell. A standardized POH format makes it easy for a savvy buyer to assess:
- Whether all required sections and relevant supplements are present
- Whether performance data matches the current configuration
- Whether weight and balance documentation is current and internally consistent
A complete, well‑organized POH that accurately reflects the airplane’s configuration is part of your resale package. It sends the same signal as clean logbooks and disciplined maintenance: this aircraft has been cared for and operated professionally.
Training Efficiency Gains
Owners who invest in structured training get a lot of mileage out of standardized manuals:
- Ground school material can point directly into Sections 2, 3, 4, 5, and 7 for model‑specific study
- Instructors can build type‑specific checklists and training outlines that mirror the POH organization
- Simulator profiles can align abnormal and emergency flows with Section 3, giving you a smoother transfer into the real aircraft
All of that reduces time and cost to move a pilot from “legal” to genuinely proficient in a given type.
Pre‑Purchase Intelligence – Using POH Knowledge to Evaluate Aircraft
If you are evaluating an airplane to buy, the POH is one of your best tools. Most buyers glance at it to confirm it exists. I go much deeper.
Red Flags Every Buyer Should Recognize
When I sit down with a prospective purchase, I work front to back through the book and watch for:
- Missing or incomplete sections. Any of the nine being absent is a problem. Sections 2, 3, 5, 6, and 9 are especially critical.
- Photocopies and mismatched versions. Random copies stuffed into a binder suggest a history of lost documents or casual attention to airworthiness paperwork.
- Outdated performance charts. Tables that do not match the current engine, propeller, or gross weight are a concern.
- Improperly integrated supplements. Major non‑factory avionics or modifications with no corresponding, model‑specific supplements.
- Weight and balance discrepancies. Obvious modifications with no updated weight and balance in Section 6.
None of these is an automatic deal‑breaker, but they all point to work and cost the new owner will inherit.
The Smart Buyer’s POH Checklist
Here is a simple way to use the nine‑section structure during a pre‑buy:
- Section 1 – General- Confirm model and serial applicability match the data plate.- Make sure the drawings and basic description clearly match the airplane you are inspecting.
- Section 2 – Limitations- Verify that placards and instrument markings align with published limitations.- Note any references to modified limitations that “see Section 9” and confirm those supplements exist.
- Section 3 – Emergency procedures- Look for procedures covering any major aftermarket systems. If they are missing, you will need to address that.
- Section 4 – Normal procedures- Compare printed procedures to any laminated or cockpit checklists in use. Large differences deserve an explanation.
- Section 5 – Performance- Confirm tables match the current engine, prop, and maximum weight. Modifications should have updated data somewhere, usually in Section 9.
- Section 6 – Weight & balance / equipment list- Cross‑check the equipment list against the actual panel and installed options.- Confirm that major changes (avionics, interior, paint, STCs) have corresponding weight and balance updates.
- Section 7 – Systems description- Make sure descriptions of key systems (fuel, electrical) still match what is in the airplane. Deviations should be captured in supplements.
- Section 8 – Handling, service & maintenance- Review servicing specs and compare them with what you see in the logbooks and on the ramp (tire types, fluids, and so on).
- Section 9 – Supplements- Match each supplement to real hardware on the airplane.- Make sure there is a supplement for every significant STC or factory option that affects how the airplane is flown.
This structured review exposes documentation issues and often points to maintenance oversights and configuration drift.
Negotiating Power Through POH Expertise
Once you identify gaps or problems, you can turn them into negotiating leverage:
- Missing or incomplete sections and supplements will take time and often money to replace or recreate
- An outdated or inaccurate weight and balance may require re‑weighing the airplane
- Misaligned limitations or missing procedures may temporarily restrict operations until documentation is corrected
You are not nitpicking; you are quantifying what it will take to bring the airplane’s paperwork and operating data back to where it should be. That has a real dollar value.
Common Pitfalls and How to Avoid Them
Even experienced owners fall into a few predictable traps with their POH.
The Section‑Skippers
A common pattern is the pilot who scans Section 4 (Normal Procedures) on a new type and stops there. The thinking is simple: “I know how to fly, I just need the basic flows for this model.”
The risks:
- Limitations are never fully absorbed, especially the subtle ones such as baggage limits, crosswind guidance, or fuel system quirks
- Emergency procedures are assumed to be “obvious” or the same as another type, which is rarely true in the details
- Supplements that change procedures or limitations never get read
My recommendation: whenever you start flying a new type or variant, treat Sections 2, 3, 4, 5, and 6 as mandatory reading.
Supplement Neglect
Section 9 often turns into the “miscellaneous attachments” drawer. The base POH looks complete, so pilots assume the rest is optional.
That can bite you:
- Avionics supplements commonly change required equipment lists and limitations for IFR, RNAV, and GPS approaches
- Float, TKS, turbo, and similar STCs alter performance and procedures in major ways
- Old or generic supplements may not match the specific version of equipment installed in your airplane
As an owner, I like to do an annual “supplements audit”:
- List every major non‑factory system on the airplane
- Confirm there is a matching, current supplement in Section 9
- Note any explicit changes those supplements make to Sections 2 through 6 and make sure your checklists and habits reflect them
Performance Chart Misinterpretation
Section 5 is also easy to misuse:
- Skipping temperature or pressure altitude corrections and “ballparking” distances
- Ignoring notes and assumptions: paved, level, dry runway; zero wind; specific short‑field technique
- Failing to account for grass, slope, contamination, or a tired engine
To avoid these traps:
- Follow the chart steps as written rather than skipping around
- Add conservative margins on top of book values
- Layer on environmental adjustments that the charts do not account for directly
Treat the POH as your starting point, not the entire story, and your margin for error improves.
Conclusion – Maximizing Your POH Investment
The standardized nine‑section POH was a quiet revolution in general aviation. It gave us:
- A consistent map to critical information across different aircraft and manufacturers
- A logical progression from limitations and emergencies through normal procedures, performance, loading, systems, and maintenance
- A structured way to document modifications and keep the operating picture accurate over an aircraft’s life
As an owner or serious operator, your POH is not just a required on‑board document; it is an asset. It protects you by:
- Making it easier to respect the airplane’s true limitations
- Providing model‑specific emergency and abnormal guidance
- Helping you plan performance and loading accurately
- Serving as the definitive record of how modifications affect operation
If you have not done a full front‑to‑back review of your own POH recently, I encourage you to block out the time. Work through each of the nine sections with a pen in hand. Note what has changed, what does not match your airplane, and where you have been relying on memory or tribal knowledge instead of the book.
For buyers, bring that same mindset into your pre‑purchase process. A strong, complete, accurate POH is both a safety requirement and a signal of how the airplane has been managed.
If you are considering an acquisition or want another set of eyes on your aircraft’s documentation before an upgrade, refinance, or sale, it is worth partnering with someone who lives in these details every day. Getting the POH, supplements, and configuration alignment right can prevent expensive surprises and strengthen your negotiating position on any transaction.
FAQ
How Often Should I Review My Aircraft’s POH?
Revisit those sections any time you change the way you use the airplane (mountain flying, more IFR, short/soft fields).
Revisit Section 9 whenever you add, remove, or significantly modify equipment.
What Is the Difference Between a POH and an AFM?
The POH is a standardized format developed with GAMA that includes the FAA‑approved AFM content plus additional information.
In most post‑1975 light aircraft, the POH also serves as the FAA‑approved AFM, which is usually stated on the title page.[5]
Can I Legally Fly With Missing POH Sections or Supplements?
Missing supplements for installed equipment can leave you without required limitations and procedures.
From both safety and liability perspectives, you should treat a complete, applicable POH (including relevant supplements) as mandatory.
How Do I Know if My POH Supplements Are Current and Properly Integrated?
Verify that each supplement references the exact model, and where applicable, the software or configuration version you have.
Make sure any changes to limitations, procedures, performance, or weight and balance are reflected in how you actually operate the airplane.
What Should I Do if I Discover My POH Is Incomplete During a Pre‑Purchase Inspection?
Work with the seller, the OEM, and any STC holders to source missing sections or supplements.
Adjust your offer or conditions to account for the work needed, and if the documentation situation is especially poor on a complex aircraft, be prepared to walk away.
Sources
- Cessna 172N POH (Wayman)
- Cessna CE-172SP POH (Goodyear)
- 8083-25 Chapter 7 (AOPA)
- FAA PHAK Chapter 9
- FAA PHAK
- Cessna 152 POH (Long Island Aviators)
- 8083-25 Chapter 9 (AOPA)
- POH Section 9 Example
- POH Cessna 172S (BEFA)
Disclaimer: Some articles on this site are created with the assistance of AI technology.