High Performance Aviation
Flying Your First Aerial Photography Mission
By Sonny Lacey
The Usual Requests from Friends
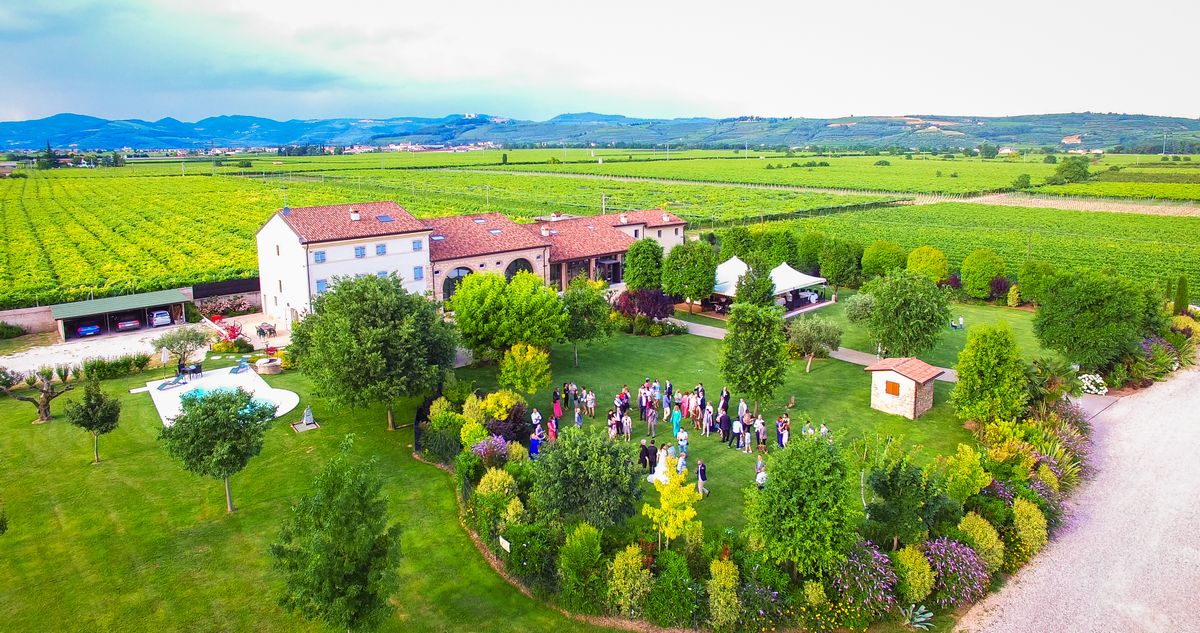
“My uncle’s ranch is just north of the Interstate…when you are flying up there, take some pictures; I want to give them to him as a birthday present.” “Hey, let’s go over to the marina and get some pictures of the boats for a calendar I’m making.” “Our wedding is next week. Could you fly over the party and get a shot?”
Having an airplane is a lot like having a pickup truck. People come out of the woodwork with all manner of requests. Many times, people have an idea for a photograph that they’d like as a gift to a family member or some other seemingly simple request. Your pilot license ignites a spark in a friend’s mind, and you start to think, “Hey…I can do this.” If you plan ahead, have the resources, and keep safety in the forefront, you can do this.
Where the Jobs Come From
Flying and taking aerial photographs have been around as long as the first cameras could safely be taken aloft. Scouting and bringing back imagery for analysis gave the airplane its first true utility in wartime. Nowadays, despite the ubiquity of manned and unmanned imagery found on the Internet, there are hundreds of cases where a person simply wants a special photograph that cannot be found online. Now. Some examples include:
- photography jobs where a building construction company desires a once-per-month image of the site progress from a specific angle
- hunting lease property owners want to plot new paths during winter
- accident reconstruction case industry requires photos regularly that still show the signs of tire marks or destroyed property
- real estate agents need a certain cosmetic shot of a house
- that company picnic with the employees forming the corporate logo has to be captured
The list goes on and on. What makes the prospect of aerial photography exciting is the diversity of these prospects and the fact that you are flying a true “mission” that requires planning, communication, decision-making and precision. Your eyes light up, and that first time your client grasps a little bit of the energy you feel when you see the world from up high is unforgettable.
Types of Photo Shoots
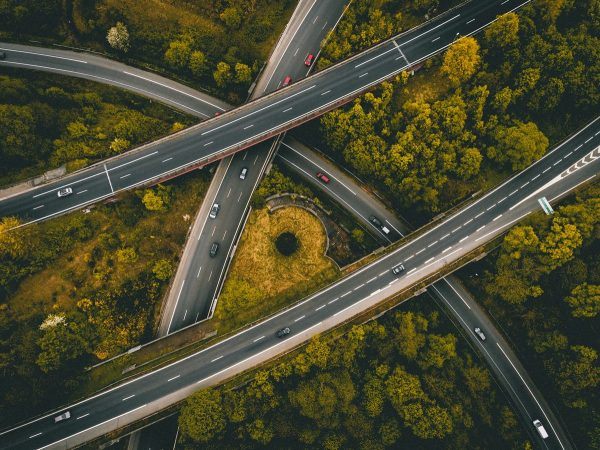
Aerial photography can be broken down into two main categories: air-to-air and air-to-ground. The largest client base will be calling for air-to-ground; however there are wonderful missions that can be flown for air-to-air. For the purposes of this article, we will focus on ground shots, and will also be concerned with still, or static, images. Photos, not movies. The aerial photographs of ground objects can be further split into two camps: oblique (cosmetic), and orthophoto (directly overhead). Again, the vast majority of your clients will request cosmetic photos, but there will be a non-zero number who need a perfectly overhead view of their area of concern. We will tackle orthophoto imagery in another installment and will concentrate on the oblique imagery here.
Your Platform and Role
Your photo platform is your plane, and we are blessed with a staggering variety for the general aviation pilot. In almost all cases, the best oblique air-to-ground images are obtained in a high-wing airplane. Think of the typical Cessna 172. Of course, a low-wing craft can be used, but you will be banking and turning around your target in order to move that wing out of the way; doable, yes, but not optimal. The typical high-wing plane should also have a window that opens up, slides down or is removable. Many aircraft windows are scratched and impart a slight haze to precision photographs. If you absolutely have to shoot from behind the window, ensure that it is as clean as possible. Here’s a tip: wipe in straight lines when clearing it; circular wiping will only exacerbate sparkles from old, crazed plastic.
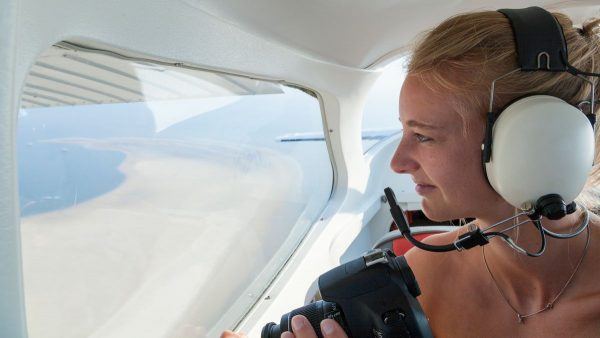
Once you have the platform chosen, you must decide who you will be. Will you be the pilot or the photographer? Both are fun, both are necessary. Can you perform both at once? That question is best answered by you, using your own checklist of “personal minimums” and your knowledge of how to fly the aircraft. Think about the likely scenario, however: you will be flying, aiming a camera, making settings to the lens, looking around, keeping the aircraft coordinated, flying near minimum airspeed for your bank angle, possibly communicating with controlled airspace facilities and listening for other traffic. If you have four hands and two heads, then go for it. Otherwise, your new best friend, the photographer, must forge an almost symbiotic relationship with you in the heat of the shoot. And that is not bad.
Getting There
“The property is just north of old Doc Haynes’ farm.” This is not what you really need to hear unless you know Doc Haynes’ area well. Communicating with the client and being absolutely sure of where to find the target is essential. Here is where online mapping resources come in handy, and where you can send map reference images back and forth with your client, narrowing down the area of concern. Here’s a tip for navigation: once you find your target on a web site such as Google Maps, you can derive the GPS coordinates by the URL, or address in the browser. It should look something like //www.google.com/maps/@32.2935917,-64.7717216,15z …where the digits “32.2935917,-64.7717216,15” relate to the decimal latitude and longitude. Depending on your GPS setup, you may have to convert these to degrees, minutes and seconds, but that can be done online at sites such as https://www.sunearthtools.com/dp/tools/conversion.php.
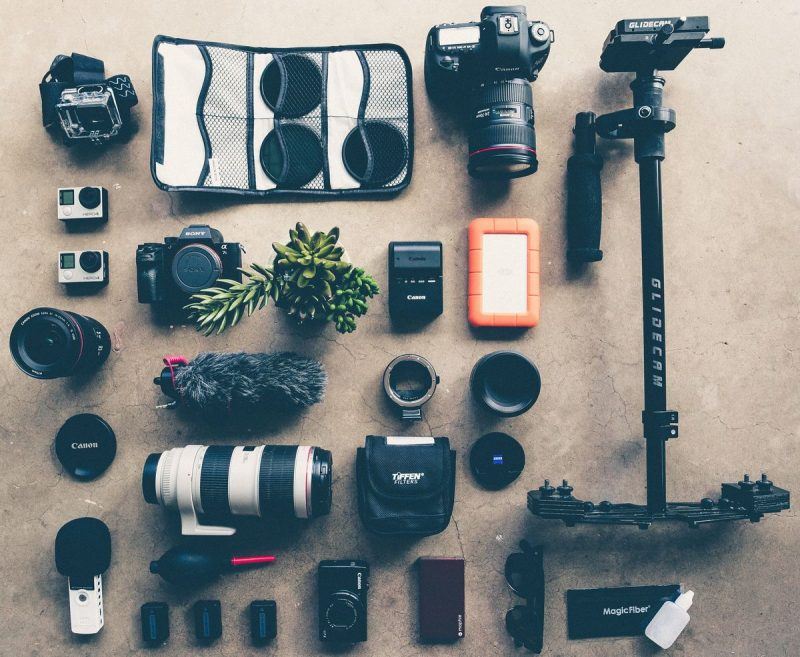
Cameras and Settings
For the photo, you should have a camera with a high-quality, removable lens. Shots taken with smaller, fixed-lens, digital cameras can be fine, but if you want maximum quality for enlargements beyond 8” x 10”, a good digital single lens reflex, or DSLR, is your go to camera. Image stabilization, either on the camera lens (as in Canon) or in the camera body (as in Nikon) is a plus. A telephoto lens that can go from 70-300mm is good to have, as well as a lens that gives you the option for a wide angle from 18mm to 50mm. Prime lenses (such as a fixed, 50mm lens) are always prized for their clarity, but have low utility when you need to tighten in on a certain area for a closer shot. Polarizer filters that are adjustable can help cut atmospheric haze, and an extra battery or power chamber is good to have. Most of the time, you will be shooting with a high “speed” over 1/250 second (TV, or Shutter Priority mode) in order to minimize shakes and blurs on the image. The cameraman will ideally hold the camera in his hands and not rest it on a part of the aircraft body, further reducing shakes. It may seem intuitive, but always wear a camera strap, especially with an open window!
Safety During the Shoot
Safety Scenario One: You have arrived at the photo shoot target site, and you are the photographer. The primary safety concern for you is to not crowd out the pilot’s communications with unnecessary talk. Concise, clear directions are important; you and the pilot must go over these before you take off. “Bank down.” “Slightly tighter turn.” “Level out.” Use directions that communicate what you need for the shot; go over it on the ground, and practice. Be aware that as you near an open window, your headset mic may pick up the wind noise and drown out the pilot’s attention on the intercom. Rotate the mic away or cup it with your hand, if possible. Let the pilot know when you are done capturing images, of course, or else he may keep orbiting until nightfall.
Safety Scenario Two: You have arrived at the target and you are the pilot. You will be orbiting the area, most likely, and you will be slowing the aircraft so that you do not zip by too fast to get a good shot. Your nose will be pitched up and you may be banking. It is extremely seductive to overbank to “get that great angle” for your photographer and not think about your airspeed. Remember your basic flight instruction: stall speed increases with bank angle. Forward visibility over the nose can become limited. As you orbit and become concerned with the shot, you start to look out the window around the photographer. Are you watching for traffic? Are you still at your target altitude? Did you even make clearing turns before barreling in? Are you flying coordinated, or are you slipping around the target? Lots to think about, and in the confusion of finding a small area on the ground, your attention and peripheral vision starts to collapse into a tunnel. You are a pilot, first and foremost, and you fly the plane. In many cases, both new pilot and photographer get engrossed in getting that perfect shot and time flows unabated. Avgas diminishes. Do you have a plan to get back home safely? Are you near or beyond your minimum fuel point? Are you flying the plane or thinking too much about the photographs?
Presentation to the Client
After the photo mission there is still much work to be done. Depending on whether you are the photographer or not, there will be photo post-editing and follow-up. Stay tuned to this channel for more tips on this enormous aspect of the presentation side of aerial photography.
A Final Note About Get-there-itis
The prospect of satisfying a client’s request is like candy. It is enticing and you want to make it happen. You can be the hero. Here is where the old virus of “get-there-itis” can strike. Just as orbiting your target can suck in all of your attention, so too can planning for and making the flight. Double this effect if it is a time-limited shoot, such as a wedding outdoors. Get-there-itis strikes everyone. Are you overlooking some small aspect in the weather? Is the plane absolutely squared away and ready? Are you physically able to manage the mission? Is the thought of swinging in and saving the day overshadowing any little wrinkle that you may find during preflight? If there is an ounce of doubt, reconsider. Safety should be your number one thought. You can re-fly many shoots. You can cancel and make people quite sad, as well. You have to have a thick skin and let people know ahead of time that missions can be scrubbed at any moment. Do not be the hero. Instead, follow a plan, get to know your photographer, be methodical, and have a safe, fun time doing it!
As a commercial pilot and aircraft owner, Sonny Lacey has been a passionate aviator and flight instructor for over fifteen years. In addition to aviation, his interests include linguistics, technology and creative writing.
Would you like more information?
Send us a message below.
MEET HPA
FOLLOW US