High Performance Aviation
Where Was I Going Again?
By Hank Gibson, CFI, CFII, MEI
For you pilots out there, think back to your student pilot days. Think to that point between the first solo and the check ride. That point where you knew how to land safely (sort of), but you still had some more to learn. This is known as the cross country phase.
During the cross country phase, every student pilot has to sit down and do a ground block with his instructor to learn how to create a cross country flight plan. It seemed quite complex at the time, what with drawing a course line and handling this overly complicated slide rule known as an E6B. Then there was the navigation log complete with ground speed and fuel calculations. It all seemed a little overwhelming, and that was before your instructor informed you that you had to figure all that out while flying!
Well, the G1000 is here to help. Before I go into how handy the G1000 is though, I do encourage all pilots to become proficient in creating a hand made, non-digital flight plan and to continue doing fuel calculations on that navigation log. The G1000 should always be used as a backup.
Flight Plan Basics
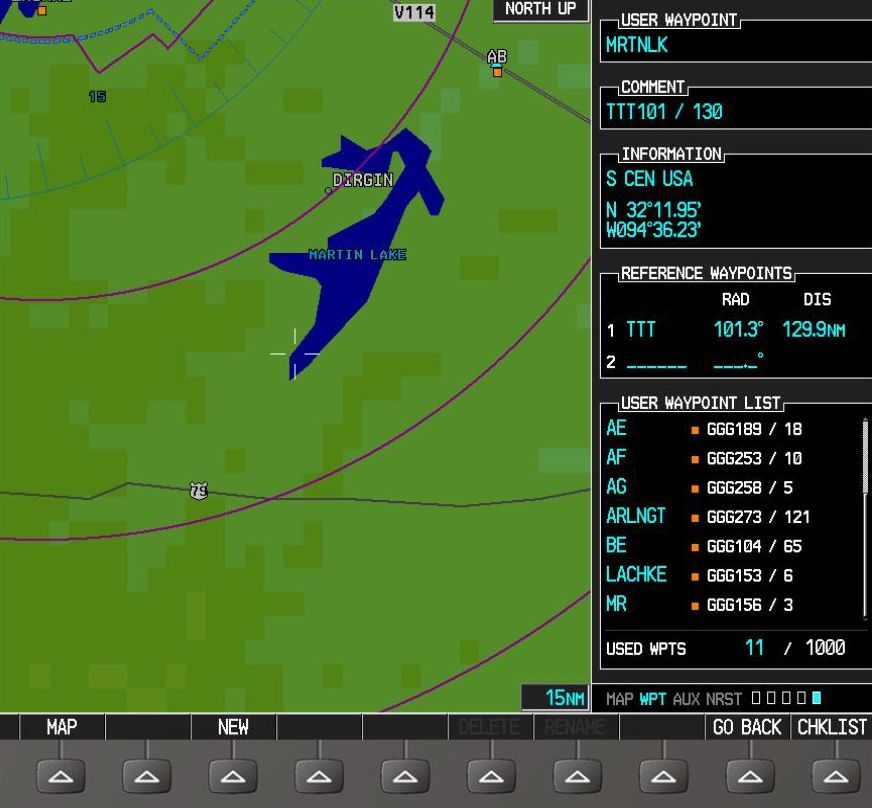
The G1000 flight plan function is usable to both VFR and IFR pilots. For VFR pilots, you are able to create user defined waypoints over anything on the moving map, then load those into the flight plan. Here’s how to proceed. Press the range knob to bring up the cursor on the MFD. Then, using the range knob, maneuver the cursor to where the checkpoint is supposed to be, then press enter. A small box will come up with two options. Using the large FMS knob, scroll down to the second option (“Create User Defined Waypoint”) and press enter. Now, just create a name for the waypoint, press enter, and the waypoint is saved into the G1000.

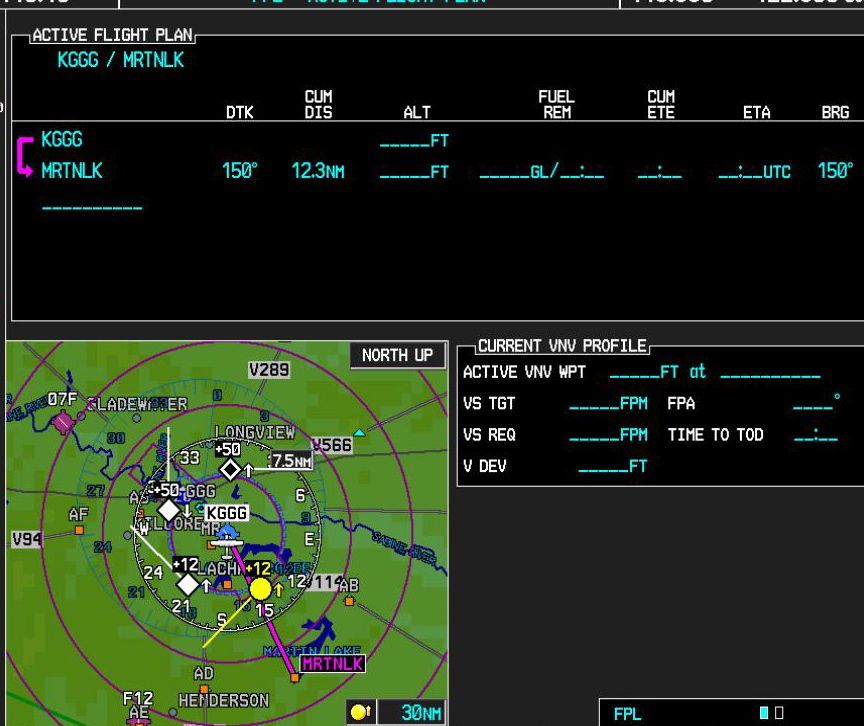
Finally, press the flight plan button and just insert the user defined waypoint into the flight plan using the FMS knob.

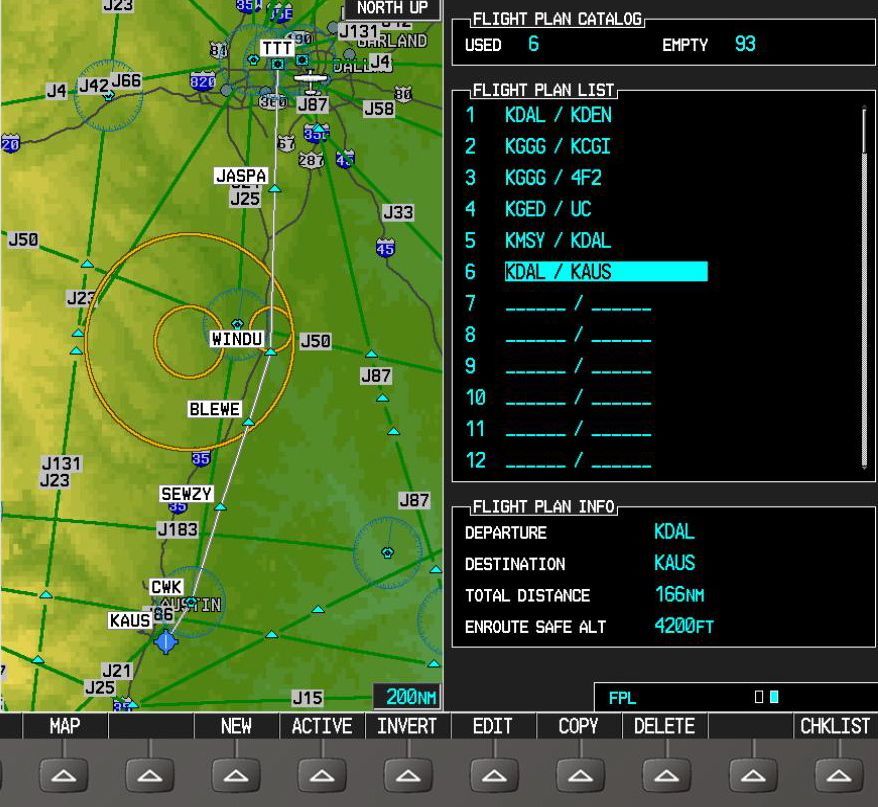
For IFR, it’s a bit simpler. For example, lets use a flight from Dallas Love (KDAL) to Austin Bergstrom (KAUS) as an example. The pilot is planning on flying the Joe Pool 4 Departure to the WINDU transition, then the Blewe 2 Arrival into Austin, also via the Windu transition.
To load this into the flight plan just takes a few knob turns and a few key presses. First, press the flight plan button on the MFD. Then, press the FMS knob to bring the cursor up and scroll to the first blank line underneath your departure airport. Press the procedure key, then use the FMS knob, scroll to the “Select Departure” button. Press enter and this will bring up the departures for Dallas Love. Using the big FMS knob, scroll to the Joe Pool 4 departure and press enter. Then, the G1000 automatically cycles to the transitions. Again, using the big FMS knob, scroll to the Windu transition and press enter. At the bottom, highlight “Load” and press enter. You have just entered a departure into your flight plan.
Now, to enter the arrival, you basically do the same thing. Press the procedure key again and scroll to “Select Arrival.” In this case, you’ll have to change the airport at the top to the Austin airport. Remember to press enter once the airport is selected! Then, just simply follow the same procedure to load the arrival as the departure.
Flight Plan Tips and Tricks
It is extremely frustrating to go through and load the whole flight plan during the preflight then shut off the master switch, only to realize the G1000 doesn’t automatically save the flight plan. Never fear, for there is a way to solve this common problem! After inputting the whole flight plan, simply press the menu button, highlight “Store Flight Plan,” and press enter. This saves the flight plan.
To load the flight plan back into the G1000 is also easy. Press the flight plan button on the MFD, then, using the small FMS knob, go to the second page. This is where the stored flight plans are kept. Simply highlight the flight, press “active” soft key, and voila! The stored flight plan is now made active!

One last tip with flight plans is how to add a waypoint. The key here is to highlight the proper point. Using the FMS knob to bring up the cursor, scroll to the waypoint you want replaced (eg. if you’re flying from Marcs to the SAT VOR and you want to fly over Braun, you’d highlight the SAT VOR since that is the once being replaced), and turn the small FMS knob. This will bring up the screen to allow you to input the waypoint.
G1000 flight plans make GPS navigation much easier. In my next article, I will discuss the direct-to function and when to use it as opposed to the flight plan function.
Would you like more information?
Send us a message below.

